


7 Field Tips for Using a Move Shoot Move Tracker By Imma Barrera
When it comes to astrophotography, a star tracker will simply allow you to take better images. Astrophotography needs the camera sensor to collect as much signal (light) with the least amount of noise possible, and that is exactly what a tracker aims to do.
Equatorial camera mounts are designed to align with the polar axis of the Earth, specifically the North Star in the northern hemisphere or the SCP in the southern hemisphere. The tracker moves at the same speed as the planet’s rotational speed but in the opposite direction so you can take more detailed images with a longer exposure free of star trailing.
You will have more freedom to play with the camera settings with a star tracker. Exposure lengths are no longer limited to less than 30-seconds due to the Earth rotation, and you can dial back camera settings like aperture for a greater depth of field and a lower ISO for less noise.
Most people, with me having been one, shy away from using a tracker for several reasons. They can be heavy to carry and a challenge to assemble, especially at night. I have owned a tracker for years but I never used it because I felt that setting it up was not the best use of my time in the field. There was so much to do with the limited amount of time I had to capture the Milky Way core.
All this changed when I borrowed the MSM tracker from a friend and I was hooked. This mount is user-friendly and lightweight! After watching the excellent tutorials put together by the company and heading out to play with it, the equatorial mount now has become a must-use tool for my astrophotography. In this tutorial, I want to share with you some tips that helped me be more efficient when using the MSM tracker in the field.
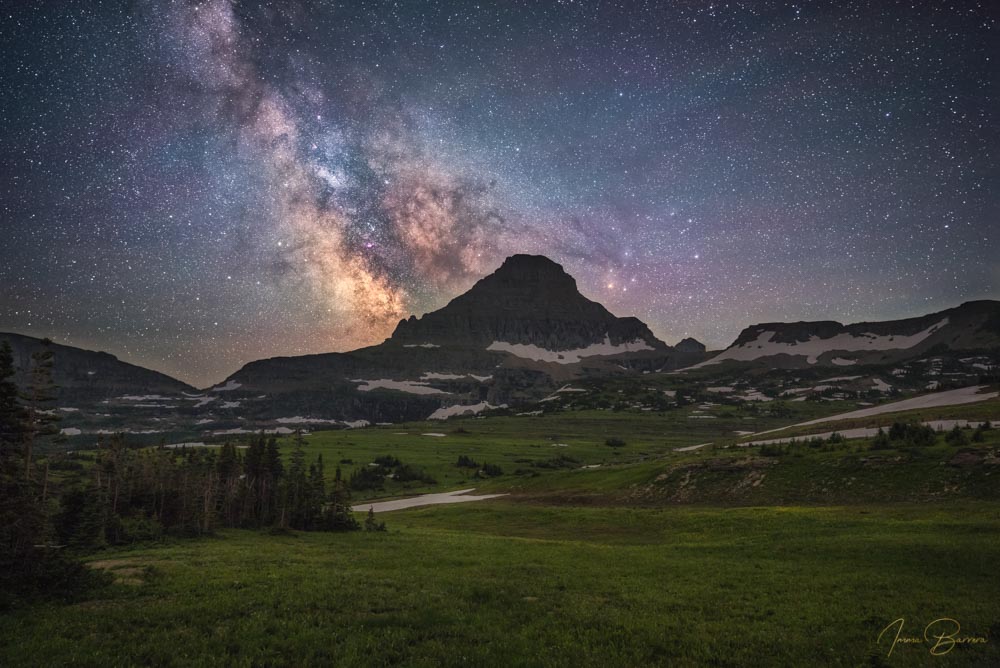
Photo July 7, 2021: Mount Reynolds Glacier National Park, Montana USA
1.- Fully assemble and test the tracker at home first.
It might seem obvious but becoming familiar with the MSM tracker before using it in the field makes a big difference. Even if I use the tracker on a regular basis, I still assemble and test the tracker at home. It is a lot more comfortable to check it in the comfort of your own home than outside during a cold, dark night. An added bonus is that the more times you assemble it, the quicker it is to set up when you are ready to capture the stars. However, in the summer, I might skip this step if I am able to assemble the gear prior to twilight.
2.- Pay attention to maximum payload capacity.
MSM trackers have a maximum payload capacity of 3 kg (6.6 pounds). Calculating the total weight of the camera body and lens is important to ensure the proper function of the tracker and to avoid damage to the mechanical parts of the tracker. We also need to take into account the weight of the ballhead, and any other attachment to the camera. Every single gram counts! Now with a tracker, you are no longer limited to a wide-angle focal length. I have calculated the total payload of several combinations of cameras, attachments and lenses with different focal lengths. Once in the field, I know which lens I will use based on which focal length will give me the composition I have envisioned. Having the ability of using lenses with longer focal lengths also allows me to capture some deep space targets. However, the longer the focal length, the more accurate the polar alignment needs to be.
3.- Settings
When using the tracker, the settings I would recommend starting with are those that give you a similar exposure to what you would use for an untracked photograph. For instance: if your “go-to” settings are f/2.8, 10 sec at ISO 6400, then you could try f/4, 80 sec at ISO1600. Those settings will give you the same exposure, but at a lower noise and better depth of field, than the same exposure without using the tracker, while ensuring sharper stars. Once you feel more comfortable with the tracker, you can experiment with f/4 160 sec at ISO800 for a cleaner image. Furthermore, since your apertures are smaller than f/2.8, you are now able to use slower lenses that are not suitable for untracked images. If you would like to capture more light and details, changing the starting settings to suit your goal is possible because the movement of the Earth no longer limits the shutter speed.
4.- Still too much noise?
There are at least two solutions if your goal is to print a large image or you are still not satisfied with the quality of your images. A commonly used technique to reduce noise from photos is image stacking. You can capture multiple tracked images (your light frames) to be stacked using a software like Starry Landscape Stacker for a Mac, Sequator for a PC, and Photoshop for both. However, you need to take into consideration that for the best stacking/tracking results, you may need to capture some dark frames (the scene without the light to correct for thermal pattern noise) and some flat frames (the accurate value for each pixel to correct distortion pattern noise). Alternatively, if you would rather not spend the time capturing so many frames for stacking purposes, a good noise reduction software might solve the problem.

Photo May 12, 2019 The Barn, Capitol Reef National Park, Utah, USA
5.- All about the foreground
There is no way around it, if you are tracking the movement of the stars, your foreground will be blurred. You need to take at least two pictures, one of the sky with the tracker switched on and one of the foreground with the tracker off. Then, blend both photos using a photo editing software. Images captured by an ocean or a flat area are easier to blend. In cases when the horizon is not straight because of the presence of trees, mountains, or other features, blending is more complex. In these instances, some people prefer to just frame the image to only include the stars above the foreground for their sky picture. Then, they will adjust the camera as needed to capture the foreground.
Take into consideration the best time to photograph the foreground. When possible, I capture my foreground images when there is more ambient light: closer to the blue hour, after the moon has risen, or it is about to set. In other words, in the summer, when the Milky Way is visible after sunset, I may shoot the foreground first and then turn the tracker on to capture the sky. In winter, when the galactic core rises close to sunrise, I photograph the sky before and then wait for more light to enter the scene.
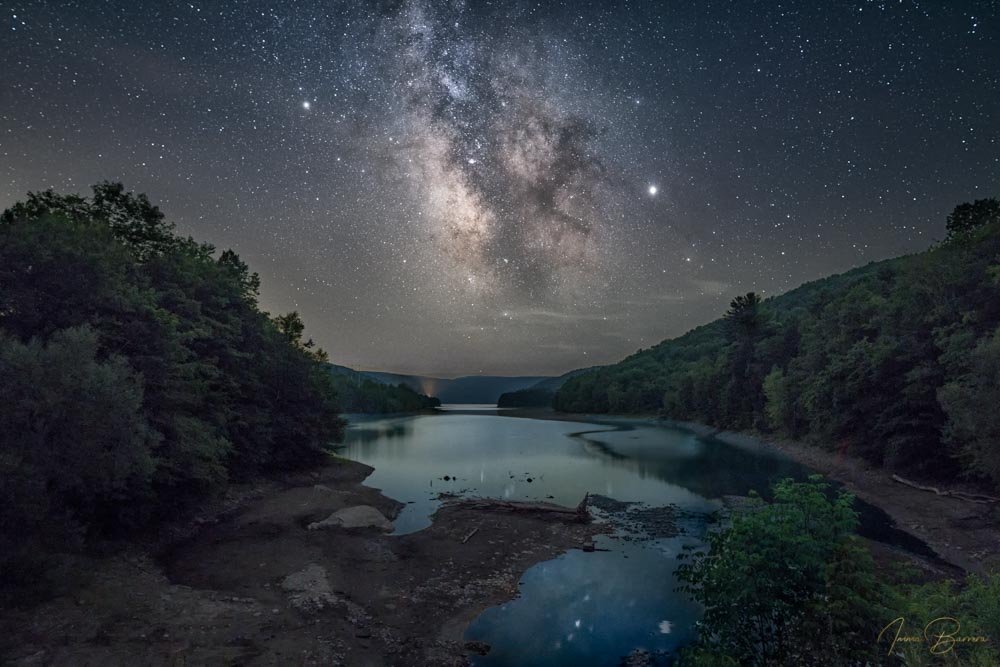
Photo July 27, 2019 The Catskills, New York, USA
6.- Keeping your lens free of water condensation
Water condensation can form on the lens when the temperature of the outer casing of your lens is close to or lower than the dew point of the air (or the dew point of the air inside the lens). The dew point is the temperature at which the air is no longer able to hold all of the water vapor, meaning that some of the vapor turns into moisture, causing beading and fogginess to form both on the inside and outside of the lens. A build-up of condensation inside the lens over a period of time may result in the growth of mold and cause other problems with the lens.
The best way to avoid water condensing in the lens is to keep the temperature of your camera and the lens above the dew point. While using the tracker, I found a good solution is the inexpensive MSM Lens Warmer/Dew Heater Band in conjunction with a portable power supply. What I really like about this Band is the controller, which has 3 settings to adjust the temperature. Most weather apps give you both the air temperature and the dew point for the location and time you plan to shoot. This information allows you to decide which of the band settings works best.
7.- What about the Moon?
As mentioned above, trackers are designed to rotate in the opposite direction but at the same speed as the Earth. The Moon orbits around the Earth at a different speed and is bright enough that a long exposure and/or tracking are not needed. However, if we would like to stack a series of Moon images, then tracking can significantly reduce the shifting from frame to frame. The goal is to keep the Moon centered in the frame for a longer period of time. This allows for taking plenty of pictures without the need of continuously reframing the Moon and reducing the amount of alignment needed before stacking. Other situations when tracking can be helpful are when capturing an eclipse or the earthshine (light reflected from the Earth back on to the Moon).
When tracking the Moon, assemble the MSM tracker as you normally would for tracking the stars. When deciding which lens to use, keep the maximum payload capacity in mind to avoid any damage to the tracker’s mechanical system. Your exposure settings should be the same as for an untracked image. When tracking an eclipse, a rising or setting Moon, or other situations where the brightness of the Moon changes quickly while tracking, adjust the exposure settings as needed to avoid overexposure.
About the author

Name: Imma Barrera (she/her)
Country: US
Born in Barcelona, Imma Barrera is a photographer based in New Jersey. She is a biologist but also a graduate of NY Institute of Photography and has exhibited her photography in a number of galleries worldwide and won several awards. She has also published several books available on Amazon.
Imma has been selected for several Artist-in-Residence programs (Capitol Reef NP, Acadia NP, Glacier NP) for her night sky photography. In addition, she was shortlisted in the Landscape Category of the 2019 Sony World Photography Awards with her series “Under the Night Sky”.
Imma runs educational programs about photography and seminars to raise awareness about the need to protect our natural treasures.


