



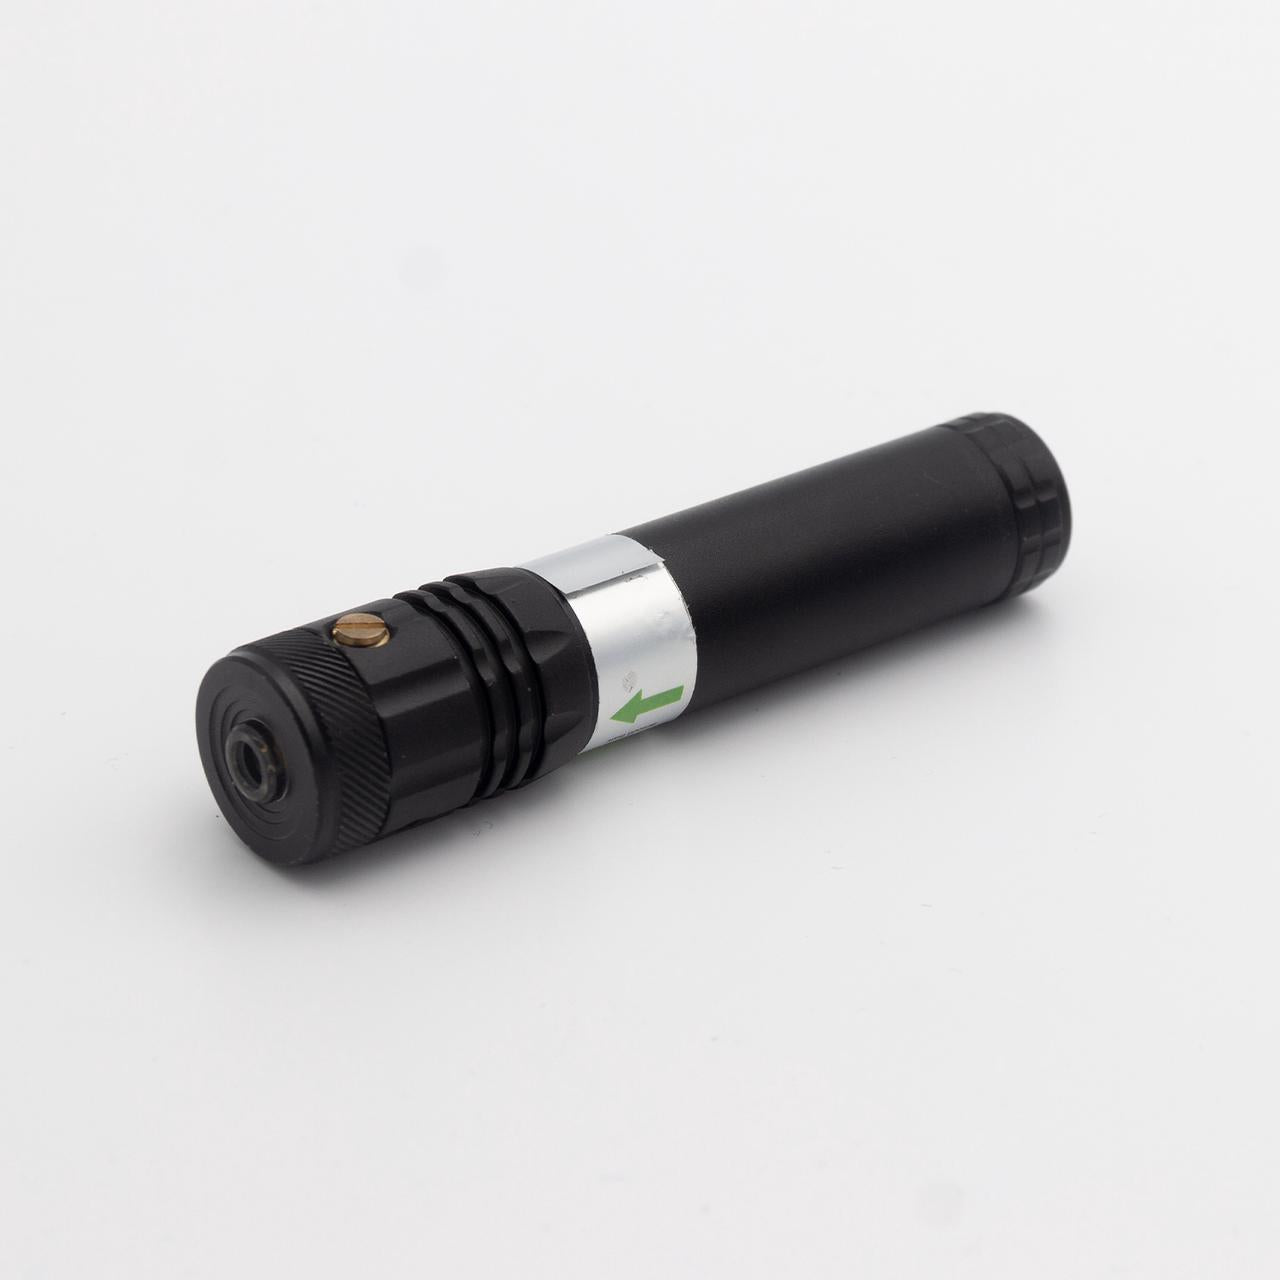
Zeiger für die Polausrichtung

Zeiger für die Polausrichtung

Normaler Preis$45.99
/
  • Kostenloser weltweiter Versand ab 99 $
Klarna
Pay in installments with Klarna
Interest-free options available for eligible purchases.

BEARBEITUNGSZEIT
Alle Bestellungen werden innerhalb von 1 bis 3 Werktagen versandfertig gemacht, Feiertage ausgenommen.

LÄNDER
Wir versenden weltweit.

LAGERHÄUSER
Derzeit haben wir 5 Lagerhäuser.
🇺🇸 US-Lager, für unsere US-Kunden, Pakete kommen normalerweise in 4-7 Tagen an.
🇨🇦 Kanada-Lager, für unsere kanadischen Kunden, Pakete kommen normalerweise in 4-8 Tagen an.
🇪🇺 EU-Lager, für die meisten EU-Länder, Pakete kommen normalerweise in 4-7 Tagen an. (Steuerfrei)
🇦🇺 AU-Lager, für unsere Kunden in Australien und Neuseeland, Pakete kommen normalerweise in etwa 4-7 Tagen an.
🇨🇳 CN-Lager, für alle Länder, Pakete kommen in 4-7 oder 8-20 Tagen an. Bitte siehe unten für Details.

Für weitere Informationen klicken Sie hier.

Diese Website ist durch hCaptcha geschützt und es gelten die allgemeinen Geschäftsbedingungen und Datenschutzbestimmungen von hCaptcha.

Der Laserpointer dient der Polausrichtung auf der Nordhalbkugel.
Nachdem Sie ihn am Sternen-Tracker befestigt haben, schalten Sie ihn einfach ein und richten ihn auf Polaris. Sobald ausgerichtet, ist Ihre Polausrichtung abgeschlossen.

Technische Daten:

Länge: 97 mm
Durchmesser des Laser-Kopfs: 21,3 mm
Leistung: 5mw /Klasse 3B
Batteriemodell: Wiederaufladbare 16340 inklusive
Ladegerät: USB-Ladegerät inklusive
Laserstrahl: Einstellbar

Sicherheitshinweis: Bitte verwenden Sie den Laser verantwortungsbewusst und vermeiden Sie es, ihn auf Flugzeuge, Fahrzeuge, Personen oder Augen zu richten. Schalten Sie den Laser nur bei Bedarf während der Polausrichtung ein.

So montieren Sie den Laserpointer am NOMAD:

  1. Schrauben Sie den roten Schraubenstopfen an der Rückseite des NOMAD ab.
  2. Entfernen Sie das Isolierpapier im Inneren des Lasers und die Schutzkappe am Laser-Kopf.
  3. Schrauben Sie den Laseradapter auf den Laser.
  4. Befestigen Sie den Laser an der Rückseite des NOMAD.


So montieren Sie den Laserpointer an Sky-Watcher oder iOptron:

  1. Entfernen Sie das Isolierpapier im Inneren des Lasers und die Schutzkappe am Laser-Kopf.
  2. Schrauben Sie den Laser in den SW Laser Adapter oder IO Laser Adapter (je nachdem, ob Sie einen Sky-Watcher- oder iOptron-Sternen-Tracker verwenden).
  3. Befestigen Sie die Kombination aus Laser und Adapter am Polsucher Ihrer Sky-Watcher- oder iOptron-Montierung. 

Für iOptron SkyGuider Pro (Gewindeteil innen) sollten Sie das IO Laser Kit von dieser Seite kaufen: IO Laser Kit

📌SW Laser Adapter Kit ist auch mit dem MSM Polsucher kompatibel

Danke an Alex McGregor! Er hat entdeckt, dass der SW Laser Adapter, den wir ursprünglich für die Sky-Watcher-Serie der Sternen-Tracker entwickelt haben, auch mit dem MSM Polsucher funktioniert. Durch die Verwendung dieses Adapters am MSM Polsucher kann das Laserblockierproblem beim NOMAD in den meisten Situationen gelöst werden.

Wie benutzt man es?

  • Schrauben Sie zuerst die Laserkappe ab

  • Befestigen Sie den Laser am SW Laser Adapter

  • Befestigen Sie diese Kombination aus Laser und Adapter am Polsucher und ziehen Sie sie fest
  • Einrichtung abgeschlossen
  • 5 stars: 149 (85%)
  • 4 stars: 22 (13%)
  • 3 stars: 5 (3%)
  • 2 stars: 0 (0%)
  • 1 star: 0 (0%)
C
Cliff Brown (Panama City Beach, US)
Great little tracker!

Purchased to take to Spain for the 2026 TSE. Worked great! If youre looking for a portable tracker, MSM nomad is a fantastic piece of kit!

S
Steve Eller (Colorado Springs, US)
Worked Flawlessly

Once I figured out the setup, I was able to repeat the setup multiple times and get some really nice and clean tracked images of the Milky Way. Love it!

V
Val Trask (Albuquerque, US)
Good job polar aligning

It does a very good job to help me polar align. One little con is that when it is on for a few minutes it dims down but I should be done aligning my Nomad by then.
It's overall a great product and it does it job. I have two now, one to polar align and the other one to help me find my target.

R
Ralph
Do not want to take pics without the Nomad starter set anymore!

I bought the starter kit (NOMAD rotator+ pointer + polarscope + wedge+ head lamp) and got results which make me crazy to try more and more galaxies. Top! I do not want to miss this set any more, no chance to a get a similar result without it. Important is the correct adjustment to Polaris and the rest is peanuts. ;o) Of course not but with a little bit training with the whole set of equipment incl. camera you will love it.

K
Kevin Read (Leeds, GB)
It all just works.

I upgraded to the Nomad from my original MSM tracker because my current camera was heavier than the previous one. I was in Scotland during a bad weather period with gale force winds and I suddenly got a half-hour window of opportunity to shoot the Milkyway. I literally ran outside with my tripod, assembled the Nomad, got a very quick and rough laser alignment on the Pole star and then it disappeared behind a cloud. I pointed my camera at the target and set the Nomad working. I took ten shots and just one 15-second exposure was clear of clouds. It was perfect. Pin sharp stars and a good composition. I was delighted. Then we were hit by 70mph winds. The MSM Nomad system is quick, light and very easy to use. The speed that I could assemble it was the difference between getting the shot and failing. It tracked perfectly. I cannot wait now to be in a position to take my time in good conditions. If I can get the image I did in 15 seconds I cannot imaging how good it will be with a longer exposure. I cannot recommend this product system highly enough. I am not getting paid to say this, I genuinely am very impressed with it. I do a lot of astrophotography and this super-mobile unit is ideal for Milkyway shots. 5-stars from me.

E
Eric Ladner (Tacoma, US)
Accurate and easy to usse

I am using the Polar Alignment pointer and its adaptor attached to the back of the Polar Scope of my iOptron SkyTracker Pro.

I get a good alignment on Polaris, and I think it’s easier to use than the Polar Scope.

D
Dorian Jones (Ammanford, GB)
Nomad and polar pointer

I recently upgraded to the Nomad tracker from the original Move Shoot Move tracker. Having (finally) had the chance to use the Nomad and the polar alignment pointer, I can confidently say the combination is light years ahead (!) of the original pairing. The Nomad is so easy to use, one switch for North or South and away to go. It's compact, lightweight, has a very secure attachment system = easy to set up - and quiet. Add the pointer to the Nomad body and polar alignment is simple. I was able to keep the pointer attached and only had to swivel my camera slightly to give the laser a clean line to polaris. Highly recommend both.

J
John S. Freitag (Ashburn, US)
An easy to use solution to long astro exposures

The MSM is very light to pack and carry, simple to set up and very easy to align with the laser pointer. I was up and running in 15 minutes. It worked very well on the first try.

A
Axel Stahr (Salzgitter, DE)
Easy top use, perfect for travelling

I got an 8" telescope with autoguiding, GPS and all that stuff. But when I'm travelling with my motorhome this little tool is what I was looking for a journey. Light and with a Laserpointer easy and fast to adjust. Taking fotos from milky way or something like that is a great memory to your holiday
Really great

M
Mark Dagneau DAGNEAU (Dexter, US)
Lazer pointer

Exellent pointer, much improved over previous offer. calibration feature is great!

F
Francesco Dimonte (Collepasso, IT)
A good compact laser pointer

The pointer is really compact, I even leave it mounted in my camera bag. I have used it a couple of times now and aligned really easily, it's just a bit dimmer than my old one, should have bought the 5mw one. But I managed to shoot 1 minute at 200mm after calibrating it so definitely works well.

G
Gray (Glendale, US)
Laser pointer easy setup

The setup and line up using the polar laser was easy and very accurate. I didn’t realize until I turned it on how far and simple the laser worked. Great tool

B
Bernd Nickl Nickl (Leonberg, DE)
Pointer for polar

I need it tfor my DSLR camera and now i find the objekts very fast.

I
Iván Cárdenes Muñoz (Madrid, ES)
Great to align polaris

It work perfectly. I didnt use the charger yet, but I think it a great idea.

J
James Arundell (Aylesford, GB)
Rotator...

MSM is truly the most portable star tracker on the market. Coupled with a decent battery life and easy USB charging I really can't fault it.

W
Werner Weyhing (Rohrbach, DE)
Pointer

Works better than expected! It's so easy to use.

T
Toby Young (Warsaw, PL)
Polarscope adds more flexibility

MSMs polarscope is a very nice addition to my portable grab-and-go astrophotography collection. Finally, a chance to experiment with a longer lens! Do a quick alignment with the lazer, and then tune that alignment with the polarscope. With care and patience, it is very quick to polar align and start capturing light. My first light test on Sadr in Cygnus with one minute subs at 135mm show no sign of trailing. (Bortle 4, Nikon d5500, Samyang 135mm, 64 lights and 24 darks, stacked in Siril). Very happy with the results from the addition of MSMs polarscope. Using the universal bracket for lazer and polarscope also makes things tidy, lightweight, and easy to setup.

K
Kevin Jones Jones (Swindon, GB)
Pointer For Polar Alignment

Love these pointers! I have 2 now. One is attached to the Universal Mount For Polar Scope & Pointer and the other is attached to the Pointer For Polar Alignment bracket, which has a hot shoe mounting plate. Put your laser in this bracket, connect the bracket to your camera's hot shoe, switch on live view on the camera. Now centre a bright star in the live view and adjust the laster so it is roughly aligned to the star in the live view. This allows you to point at deep sky targets by star hopping with very good accuracy.

S
Susan Gagne (Calgary, CA)
Quick and Easy

I have the sky guided pro but needed something smaller and lighter for a trip and future backpacking trips. Worked great. MSM Facebook group super helpful in getting set up for the first time.

S
Scott Scott (Iola, US)
Under the stars

I have been a photographer for over 45 years and had always wanted to try astrophotography yes I could do the high ISO shots of 20 second's but was not satisfied with the results too much noise and not enough details.
I have droold over the star tracker's on Amazon but couldn't afford the 400 dollars for one then I seen the move shoot move on Instagram and thought wow that's affordable.so I ordered it I've been out with the move shoot move a few times and I'm very impressed with it now I can take very long exposures at an ISO much lower love it definitely well worth the money

Das könnte Ihnen auch gefallen