Come calibrare correttamente il reticolo del cannocchiale polare per aumentare la precisione nel tracciamento delle stelle
-
! Prima di intraprendere qualsiasi azione, tieni presente che la calibrazione (o registrazione) del cannocchiale polare è un compito non banale e non è necessaria se il tuo inseguimento funziona normalmente entro il limite di carico. Questa guida è destinata agli utenti che conoscono l'uso di un cannocchiale polare e comprendono quando può essere necessaria la calibrazione.
-
Inoltre, maneggia con cura il vetro del reticolo — è fragile e potrebbe rompersi se viene applicata una forza eccessiva. I danni causati da una manipolazione impropria non sono coperti dalla garanzia.

Informazioni sull'autore
Stefano Ciurleo è un architetto IT presso GME (Gestore dei Mercati Energetici), dove lavora dal 2002.
Prima del 2002 ha lavorato nell'automazione industriale e nella visione artificiale.
È un fotografo naturalista amatoriale e astronomo con la passione per i viaggi.
MSM: Stefano Ciurleo, fotografo italiano e appassionato di chitarra, è uno dei nostri utenti e non possiamo ringraziarlo abbastanza per aver dedicato del tempo a scrivere un tutorial così bello per tutti gli appassionati del cielo notturno. Puoi scoprire di più su di lui su Flickr e trovare questo tutorial in italiano sul suo Notebook condiviso.
Per ottenere la massima precisione nell'inseguimento del moto apparente delle stelle, l'asse di rotazione del reticolo deve essere allineato con l'asse di rotazione del cannocchiale polare.
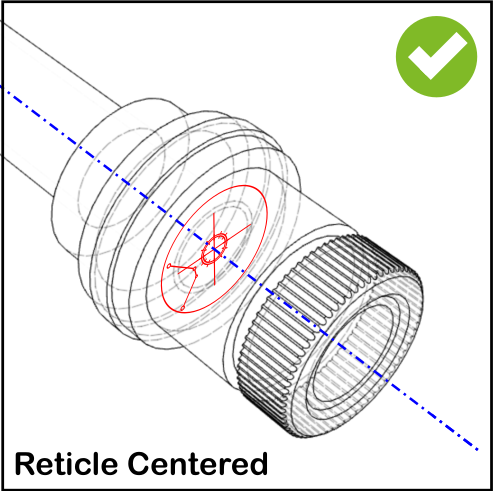
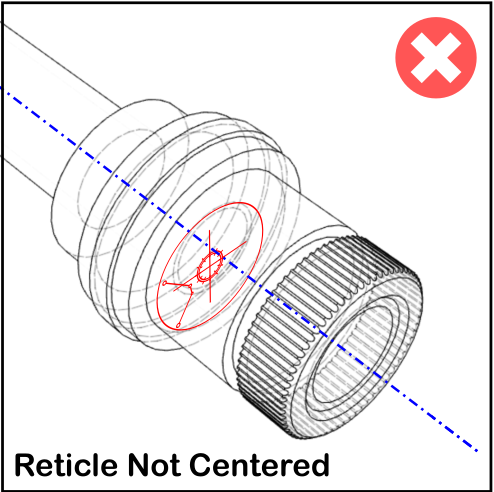
Per verificare se il reticolo è centrato, devi collimare un oggetto come un'antenna, un tetto o un traliccio della linea elettrica durante il giorno e ruotare il cannocchiale polare sul suo asse. Il centro della griglia deve rimanere sempre sul punto selezionato.
Se il reticolo risulta decentrato, sarà necessario procedere con la calibrazione. Il processo potrebbe non essere semplice per tutti, quindi prima di apportare modifiche, consiglio di effettuare alcuni test di scatto per verificare se la precisione è sufficiente per il proprio scopo. Tuttavia, più il reticolo è centrato, più lungo sarà il tempo di inseguimento ottenibile.
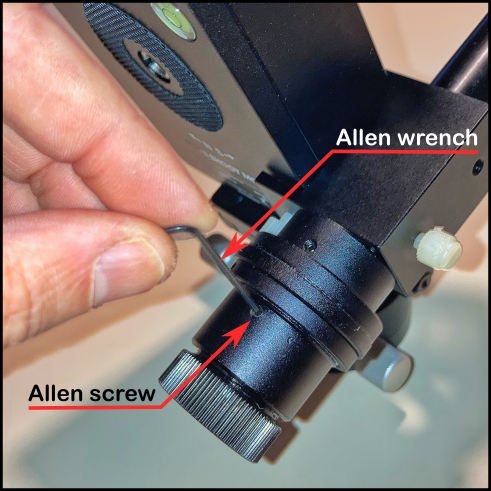
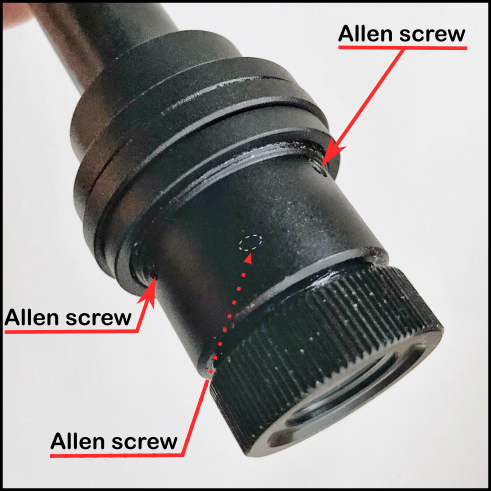
La cornice del reticolo è collegata al cannocchiale polare con tre viti a brugola. Per correggere la posizione del reticolo, è necessario regolare le tre viti.
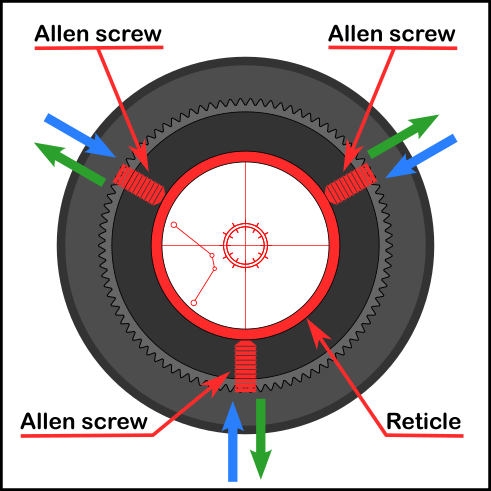
Con una chiave a brugola, esegui piccolissimi aggiustamenti stringendo una vite dopo aver allentato le viti opposte per spostare il reticolo in modo da compensare la deviazione dal centro. Effettua movimenti molto piccoli e controlla lo stato ruotando il cannocchiale polare. Ripeti l'operazione finché il reticolo non è calibrato al centro.