


What Happened Behind the Eclipse Photos
 < User Story·Vol.14 >
8-10 min read
Welcome to the fourteenth edition of our User Story series.
This time, we're heading to Spain, where Patrick Gawandtka (@patrickgawandtka.fotograf) captured the breathtaking 2026 total solar eclipse as the Sun approached the horizon.
Want to see how all that planning came together?
🎒 Planning a Portable Eclipse Setup
One important part of my planning was that the entire setup had to remain suitable for air travel.
I deliberately selected the equipment so that all essential photographic gear would fit into my Atlas Adventure Pack and could travel with me as hand luggage. The drone was the main additional piece of equipment.
The Sony Alpha 1 with the 200–600mm lens and the additional mounting hardware was admittedly a fairly heavy setup for the NOMAD—probably heavier than ideal.
However, because I was working with very fast shutter speeds during most of the critical phases, small vibrations or micro-movements were not a practical problem in the final images.
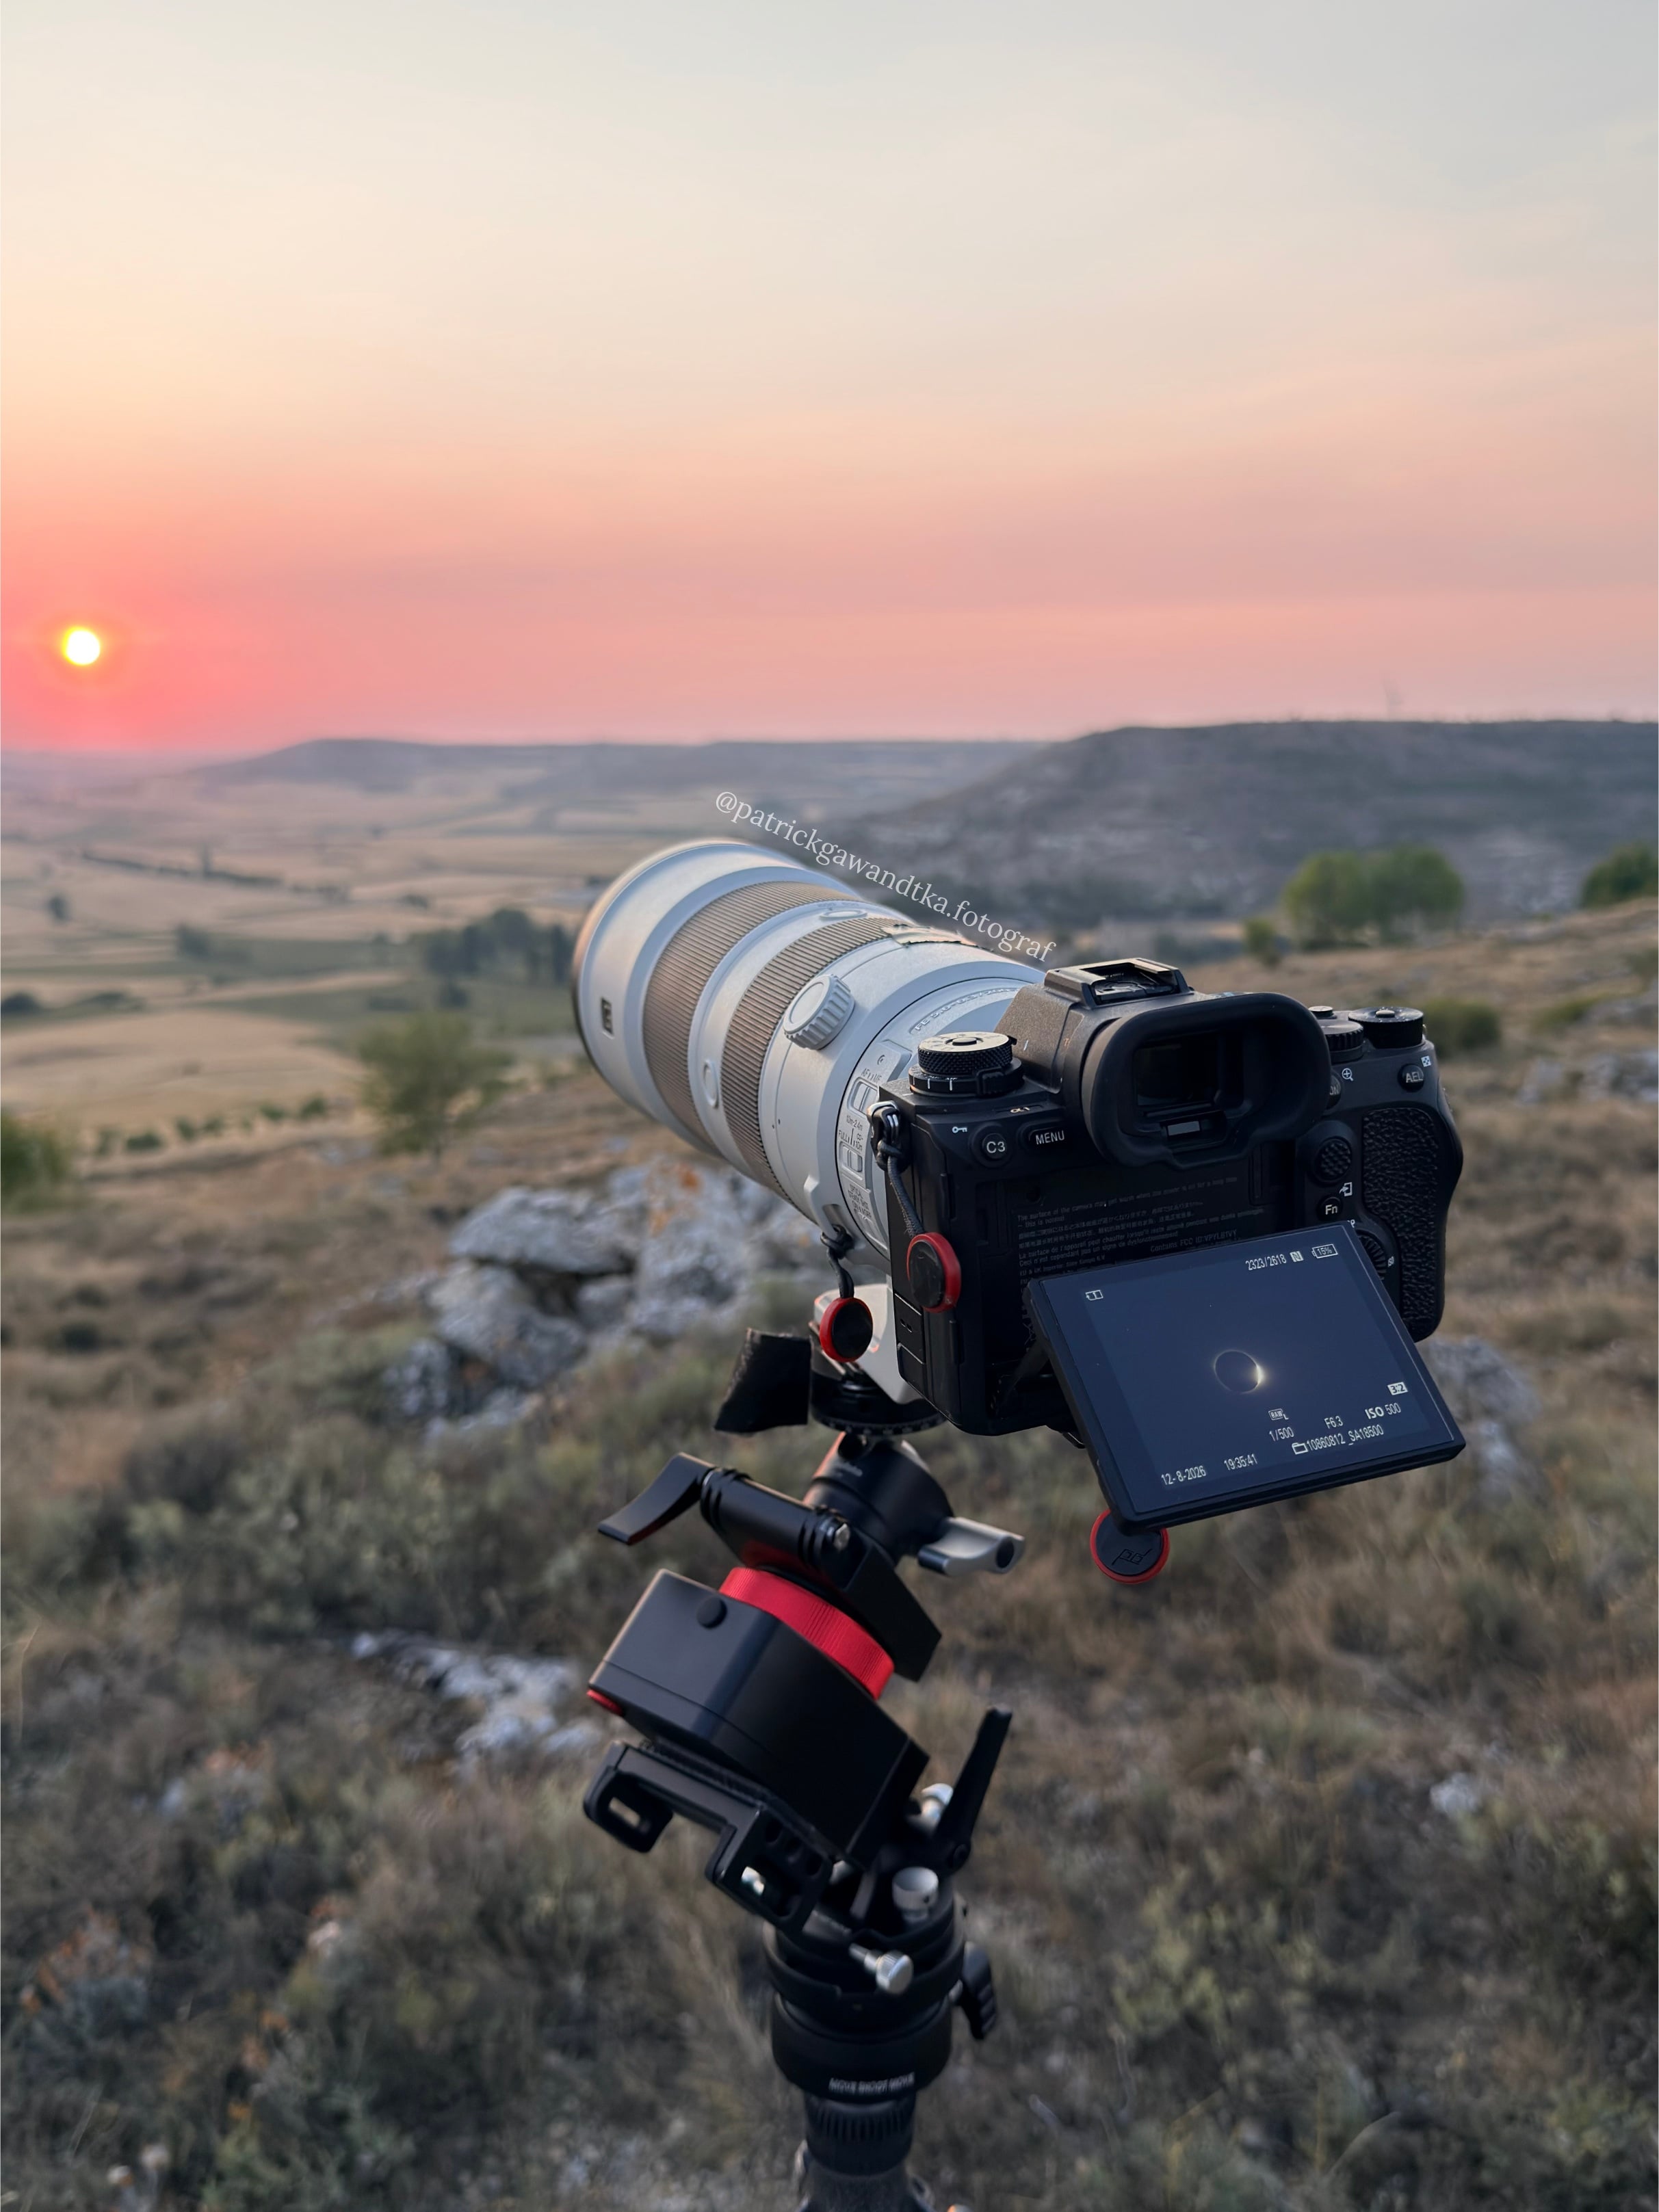
Gear List
|
Camera |
Sony Alpha 1 |
|
Lens |
Sony FE 200–600mm F5.6–6.3 G OSS |
|
Tracker |
|
|
Wedge |
|
|
Leveling Plate |
|
|
Mounting Plate |
|
|
Ball Head |
Lightweight Ball Head |
|
Accessory |
NiSi IR ND100000 Solar Filter |
|
Tripod |
Gitzo Tripod |
📝 Preparations Before the Eclipse
A large part of the work actually happened before the eclipse.
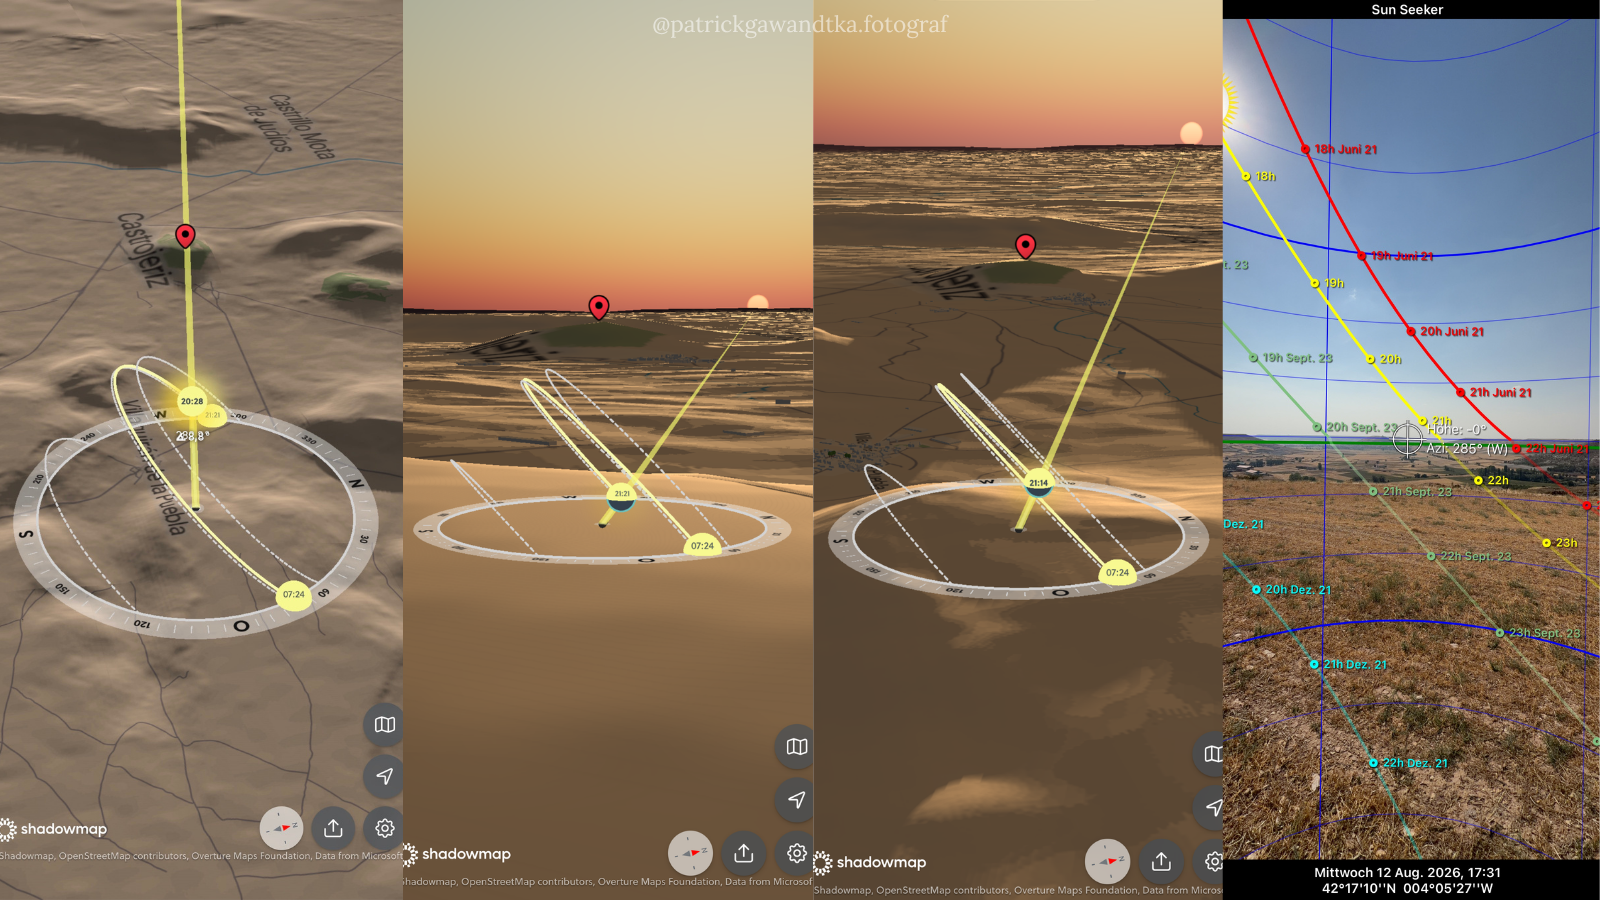
I used Shadowmap, Sun Seeker, Google Earth and Planit Pro to compare possible locations and to understand exactly where the Sun would be during totality and during its final approach to the horizon.
Once on location, I used Polar Scope Align Pro to align the NOMAD accurately with the celestial pole in daylight, when Polaris itself was not visible.
The most important preparation, however, was the camera workflow.
During the rapid sequence from C2 through maximum eclipse to C3, there is simply no time to stop and think. Everything has to be prepared beforehand, and everything has to work.
For that reason, I programmed the complete exposure strategy into the three Custom Memory positions of the Sony Alpha 1 before the eclipse.
📱 Apps and Planning Tools
1.Polar Scope Align Pro – for accurate polar alignment of the NOMAD in daylight
2.Solar Eclipse Timer – for precise audible timing and phase warnings
3.Shadowmap – for evaluating terrain, shadows and the Sun's position
4.Sun Seeker – for checking the Sun's path and direction on location
5.Google Earth – for terrain and location scouting
6.Planit Pro – for detailed photographic planning and simulation of the Sun’s position and the eclipse
⏱️ My basic sequence
Custom 1 – C1 / partial phase: 5-frame AEB sequence.
Custom 2 – around C2: 3-frame AEB sequence. I deliberately reduced the number of frames here to achieve very fast shooting sequences during the rapidly changing moments around second contact.
Custom 3 – maximum eclipse / totality: 7-frame AEB sequence with 2 EV between exposures. This gave me a much wider exposure range and allowed me to capture more of the faint outer corona while still retaining detail close to the Sun.
After maximum eclipse I switched back to Custom 2 for C3.
For the following partial phase around C4, I returned to Custom 1.
During the final sunset phase I adapted the Custom 1 settings again to the rapidly decreasing light level and the Sun approaching the horizon.
🔍 Four Lessons from Totality
1.Every Second Matters
The camera was triggered with a remote shutter release, so during the most critical moments my job was essentially reduced to switching between the prepared memory positions and triggering the exposure sequences.
The Solar Eclipse Timer app was invaluable during this part of the shoot. Its audible countdowns and warnings told me in advance when the next critical phase was approaching. Around C2, maximum eclipse and C3, those few seconds matter enormously.
2.Remove the Filter at the Right Moment
The timing was also essential for handling the solar filter. Shortly before C2, I unscrewed the ND100000 filter from the lens but continued holding it directly in front of the objective.
This meant that, at the app's warning, I could remove it instantly instead of losing valuable seconds unscrewing it.That was important for capturing the transition around C2 and the Diamond Ring.
At the same time, I did not want to remove the filter too early: with a 600mm lens pointed directly at the Sun, the concentrated sunlight can potentially damage the camera.
The audible timing cues therefore gave me a very precise reference for when to prepare the filter and when it was safe to remove it.
This is another reason why rehearsing the complete sequence beforehand is so important. During these few seconds, there is simply no time to improvise.
3.Run a Final Physical Checklist
It also explains one of the mistakes I made with one of my secondary cameras. The lens cap on the FUJIFILM was deliberately left on during preparation to protect the camera while it was pointed towards the Sun.
In the rush around the critical phase, I forgot to remove it. The camera then happily recorded around 1,000 images — of the inside of the lens cap.
It is funny afterwards, but it was a very good lesson: even with a carefully automated setup, every camera needs a final physical checklist before the critical phase.
4.Plan Ahead to Stay Focused
The combination of careful location planning, precise polar alignment, pre-programmed camera settings, remote triggering, solar-filter preparation and audible timing cues allowed me to concentrate on the eclipse itself instead of operating menus or making last-second technical decisions.
Leave a comment