


🌌How I Shot Andromeda at 200mm for the first time with NOMAD

< User Story·Vol.12 >
12-15 min read
Welcome to the twelfth edition of our User Story series.
This time, we're heading to Spain, where David García González (@davidgargonza) captured the magnificent Andromeda Galaxy from his backyard under Bortle 4 skies.
From Wide Angle to 200mm 🤔
I got into astrophotography in 2025, mainly shooting wide-angle summer nightscapes. By the end of the year, an astro-modified camera opened up deep-sky and winter photography—disciplines I had previously viewed as completely separate.
I had never used the NOMAD with a long focal length. All my previous work had been wide-angle, so I tested it from my Bortle 4 backyard. Though worse than my usual dark sites, it allowed me to bail easily if anything went wrong.
I chose Andromeda because it is large and bright, and seemed like a forgiving target for a first attempt. I set up the equipment without counterweights, not knowing how much the tracker would handle.
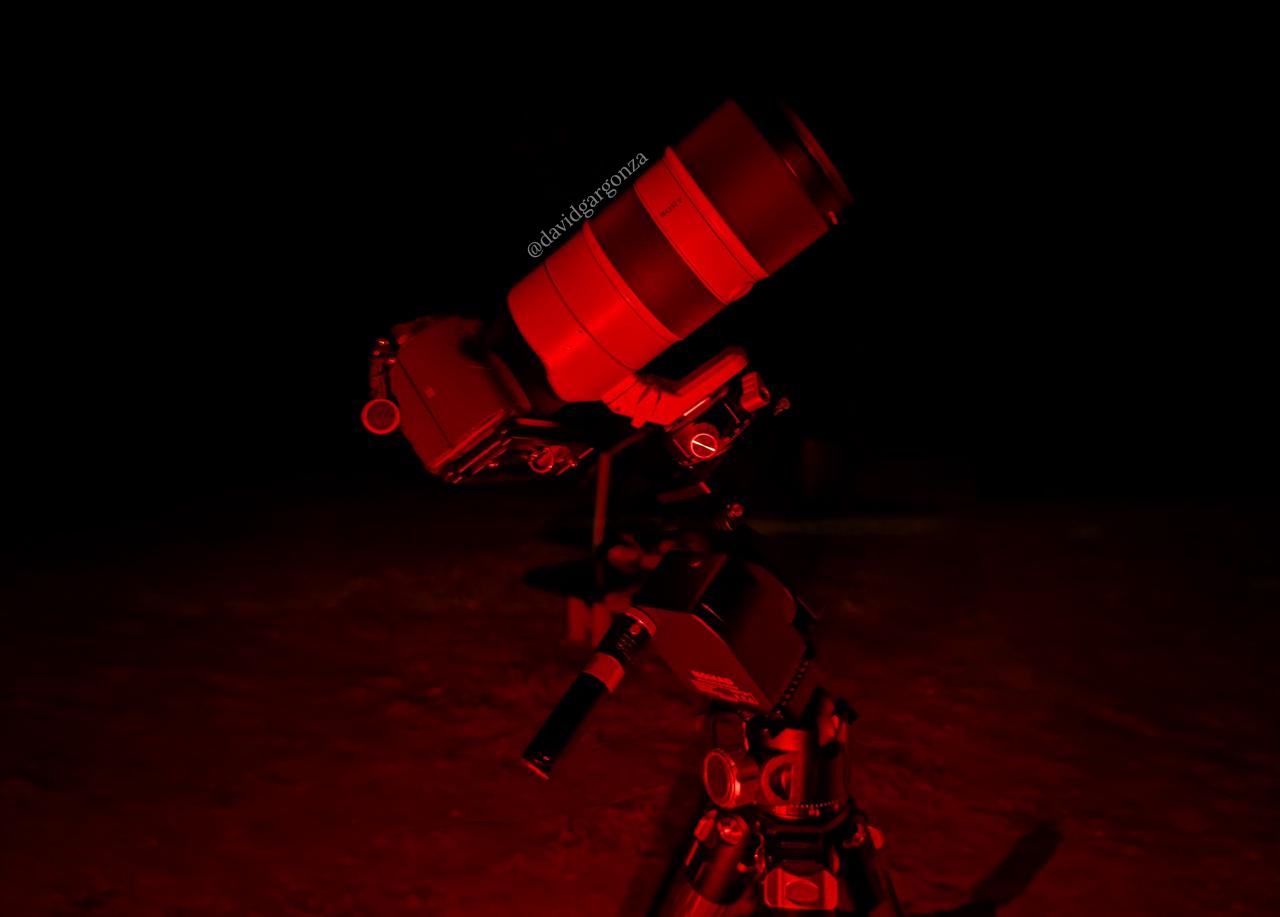
The setup was simple: tripod, ball head, NOMAD, MSM Z Plate, a panoramic base with Arca Swiss, and a Sony A7 III astro-modified camera with a 70-200mm f/2.8.
The whole setup weighed about 2.5 kg, roughly 70% of the NOMAD's capacity.
Setting Up and Letting It Run 📸
I polar-aligned using the MSM laser aimed at Polaris and started testing in bulb mode. To my surprise, I was getting clean exposures of up to two minutes at 200mm. I eventually decided to work at 90 seconds to leave some margin as the setup became increasingly unbalanced.
I shot two different series: 30 exposures of 30 seconds each for the core,which is much brighter and easy to overexpose, and as many 90-second exposures as the tracker could handle for the outer regions.Night one yielded 47 exposures (34°–54° altitude). Processing a quick test the next day exceeded my expectations for a backyard shot, convincing me to shoot a second night.
This time I left the tracker running overnight. When I packed it up, I had another 122 exposures from 37° up to 73°. Around 70°, shifting balance introduced star trails, costing me ~40 exposures (nearly an hour of data).Before wrapping up, I shot 32 darks at the same sensor temperature.
Why Altitude Mattered More Than Exposure Time 🌌
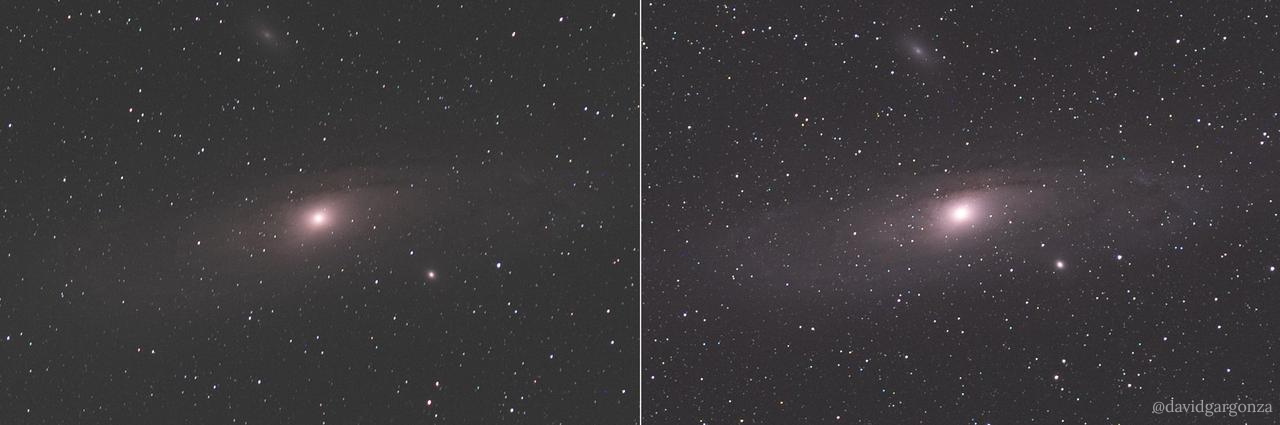
The most interesting discovery came when I reviewed the data: RAW files from the end of the session clearly showed more detail than those from the beginning. Same settings, same night, same lens—only Andromeda’s altitude had changed.
DeepSkyStacker's sky background values dropped by a third as Andromeda climbed. While not calibrated photometry, the trend was clear: higher exposures yielded roughly one-third more useful detail.
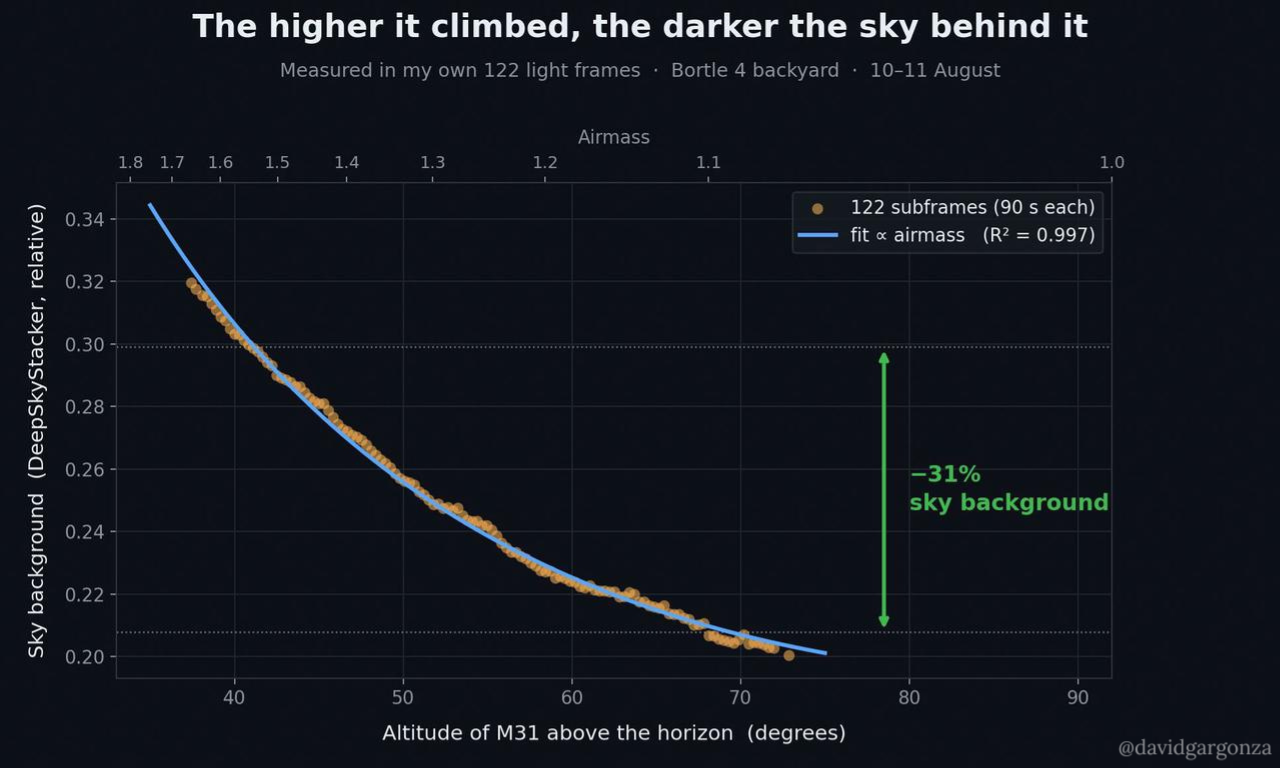
At higher altitudes, light pierces less atmosphere for a stronger signal against a darker background. Both factors work in our favor. And because stacking more photos brings smaller and smaller gains over time, simply shooting longer to make up for bad conditions isn't worth the effort.
My takeaway was simple:
*One hour with Andromeda high in the sky can be worth almost as much as twohours with it low on the horizon.*Since my latitude aligns with Andromeda’s declination, it passes almostdirectly overhead. Waiting for culmination costs nothing and makes a hugedifference.
Quality Over Quantity 💻
Across the two nights I accumulated around five hours of long exposures,but after removing the frames with trails and testing different stacking combinations, the best result came from keeping only about three hours.Signal-to-noise increases with the square root of integration time, so continuing to add mediocre exposures does not always pay off. In this case,filtering the data was more valuable than simply accumulating more of it.
The processing workflow was relatively straightforward:
- Stacking: Core and outer regions stacked separately in DeepSkyStacker (average method, best-quality frames only).
- Blending & Star Removal: Stacks combined using a mask, followed by star separation via StarNet++.
- Background Processing: Levels and curves stretch applied to the starless image in Photoshop.
- Noise Reduction: "Dust and scratches" filter applied strictly to empty background areas, avoiding nebulosity and galaxy details. I did not use AI noise reduction at any point.
- Final adjustments: Stars reduced, recombined with the background,and polished in Camera Raw.
I also accepted a few limitations. I didn't shoot flats, so I had to deal with the vignetting from the 70-200mm at f/2.8 throughout the entire process, making it harder to separate the real galactic halo from the background gradient. A deep-sky specialist using Siril could extract more signal, but for integrating astro into nightscapes, the result is more than enough.
Four Things I'm Taking Away ✨
- Altitude: Plan around culmination, not convenience. Higher altitude yields better signal.
- Balance: Balance your setup for where it will end up to avoid star trails later in the night.
- Exposure: Blend short exposures for bright cores with long exposures for faint outer details.
- Polar Alignment: Align on the true celestial pole rather than
directly on Polaris to improve tracking accuracy.
Gear List
|
Camera |
Sony A7 III (astro-modified) |
|
Lens |
Sony FE 70–200mm f/2.8 GM OSS (shot at 200mm) |
|
Shutter Release |
Custom-made BLE intervalometer app for Sony |
|
Tracker |
|
|
Polar Alignment Tool |
|
|
Ball Head |
Innorel N52 |
|
Plate |
|
|
Accessory |
Panoramic base with Arca -Swiss clamp |
|
Tripod |
Innorel KT364C |
Leave a comment